comments 2

Orange Marmalade Recipe Made Easy

Marmalade – at its simplest just three ingredients- oranges, sugar, water. I have always been a fan of eating the citrusy tangy orange jam, like Paddington Bear, but never made it myself. As a food blogger I would like to think I know my way around a kitchen & a jam jar, having made jams and chutneys many times. So after recipe reading, lots of opinions, tips & techniques, a mistake or two along the way, here goes – my marmalade tales: my how to/how not to guide of what I did, learnt and made.

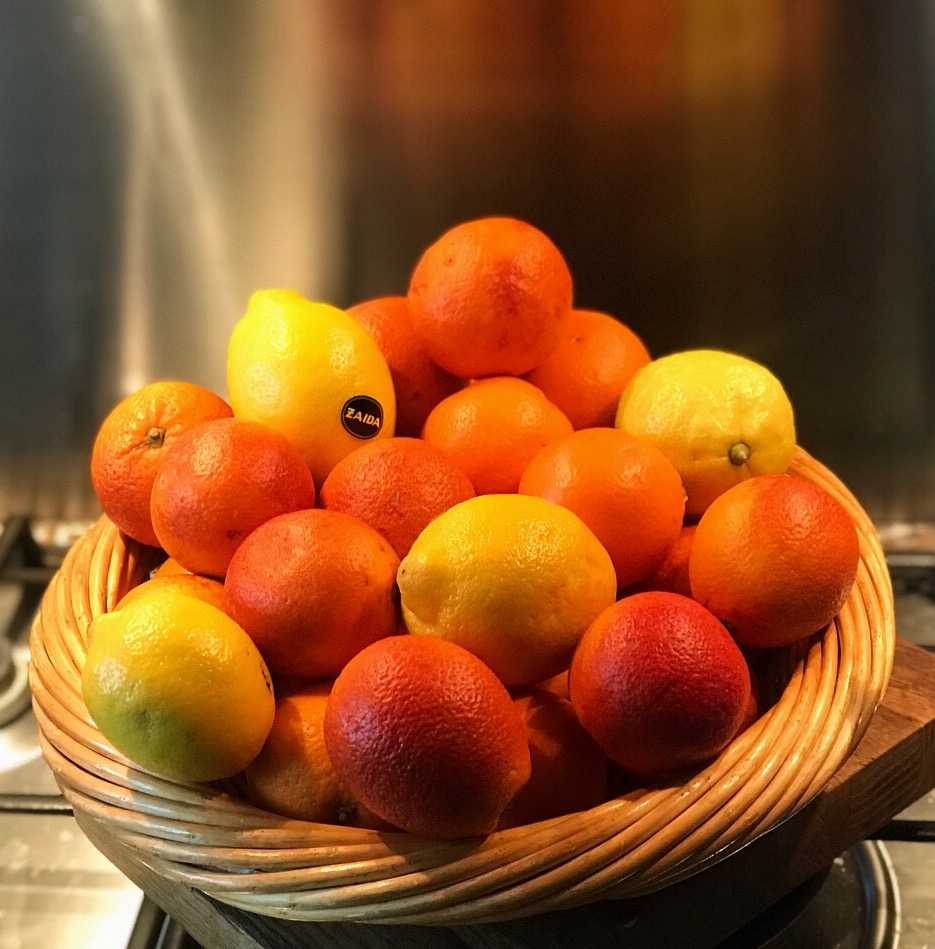
Seville & Blood Oranges & Lemons

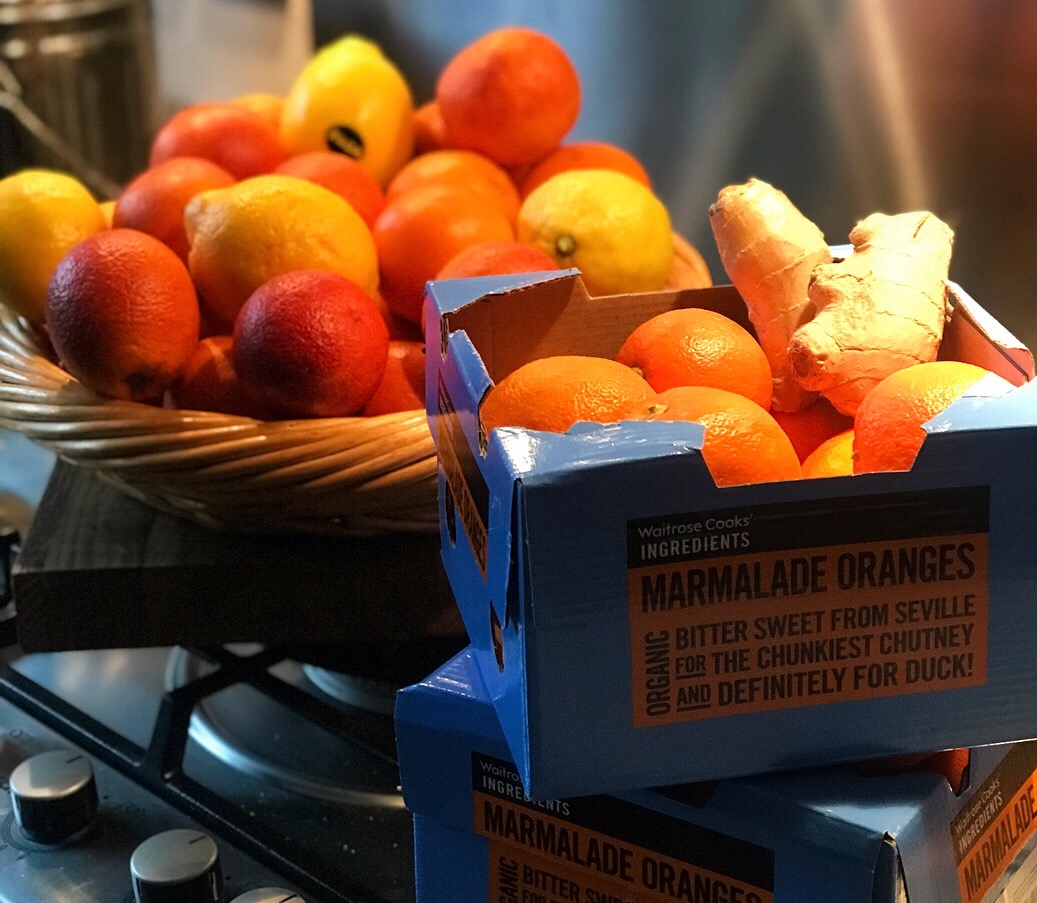
Timing & sourcing – the first important tip. January is the Seville orange season, and my original plan was to make marmalade then. A few weeks delay meant a quest and hunt for the allusive key ingredient.   My local green grocer said  “you won’t find Seville oranges now in February you’re too late for this season”.  Three shops later I had decided to make with Italian blood oranges only so bought a large quantity.

Beautiful Fruit – Seville Oranges from Ave María Farm

Just one more shop, and to my surprise there they were- a few boxes of organic Seville-amazing! The Ave María farm (@avemariafarm) of Mairena del Alcoa, Seville,  the growers – my marmalade saviours.  To my delight at finding Seville oranges – lots more oranges purchased. Which leads to my next key learning- time. Sounds obvious but ensure you have enough time, especially as a first timer. My first mistake- the more oranges, the longer it will take to prepare and make – simple. So marmalade ingredients found, knives sharpened, bowls, jam pan & stock pot at the ready. Lots of research – who knew there would be so many recipes, hints, tips, opinions on how to make marmalade.  I found a recipe that said “foolproof, although it takes time, it is easy, just follow the steps and you are 100% guaranteed great marmalade”.  I was “sold” so fruit washed and soaked in 2 big stock pots overnight. I am a fan of the Slow Food movement but 3,300 minutes, really? Blog banter the next day with Simon, who laughed  telling me his Mum Rayner, a seasoned marmalade maker, never takes that long! So my second mistake  re-reading the recipe was “where is the rind? “ I like my marmalade with “thick cut” peel and no mention of peeling, paring or cutting! So change of recipe and some great advice from the Yotam Ottolenghi Facebook group  crew- Kate, Zahra,  Lous especially- on line help from UK &  Netherlands plus all the encouraging comments from further afield- global supportive foodie communities are fab! So oranges now on the boil  with wonderful citrusy aromas wafting around the kitchen. I made 17 jars of Seville & blood orange marmalade with muscovado  sugar &  Auchentoshan Scotch whisky, recipe below. Also 3 jars of blood orange, fresh ginger and Campari marmalade. I have scaled down the recipe to a more manageable number of oranges and included the things I learnt.

taste2taste test!

I even got the thumbs up from a VIP: marmalade lover, food critic, my cookery teacher and inspiration- my Mum! Thanks to everyone for all your support, encouragement, banter. You never know next year,  the World Marmalade Awards held at Dalemain Mansion, Cumbria, UK: @marmaladeawards, @dalemainmansion, newcomer category- I can but dream 🍊🍊🍊

Ingredients makes about 10  x  450g or 1 lb jars marmalade

450g/ or 1/2 lb Seville Oranges

450g or  1/2 lb Blood Oranges

Juice of 2 lemons, retain the pips

900g/2lb  granulated sugar

100g/0.2lb Muscovado sugar ( if not using just substitute with extra granulated)

Cold water, enough to cover fruit about 2.25l or  4 pints

3 tablespoons of Scotch Whisky ( optional)

Kit

10 glass jars & lids washed in warm soapy water & drip dried, more in method about sterilising jars & lids

Jam pan or large deep heavy based pan- stock pot or casserole

Large heatproof  bowls

Large slotted spoon, large metal spoon or metal ladle, large wooden spoon/ jam spoon & a metal tablespoon

Large muslin square

Kitchen string

Food processor ( optional)

Jam thermometer ( optional), check photo & method  for set point

2 metal baking trays

Metal jam funnel (optional) or a steady hand!

Heatproof oven gloves

saucer placed in the freezer to test the set point

Method

Wash the oranges, place in a large pan and cover with cold water about 2.25l/ 4 pints. Bring to the boil and simmer on a medium heat for about 1.5 hours until the fruit is soft, skin especially. Using a slotted spoon remove the oranges and place in a large heatproof bowl to cool.

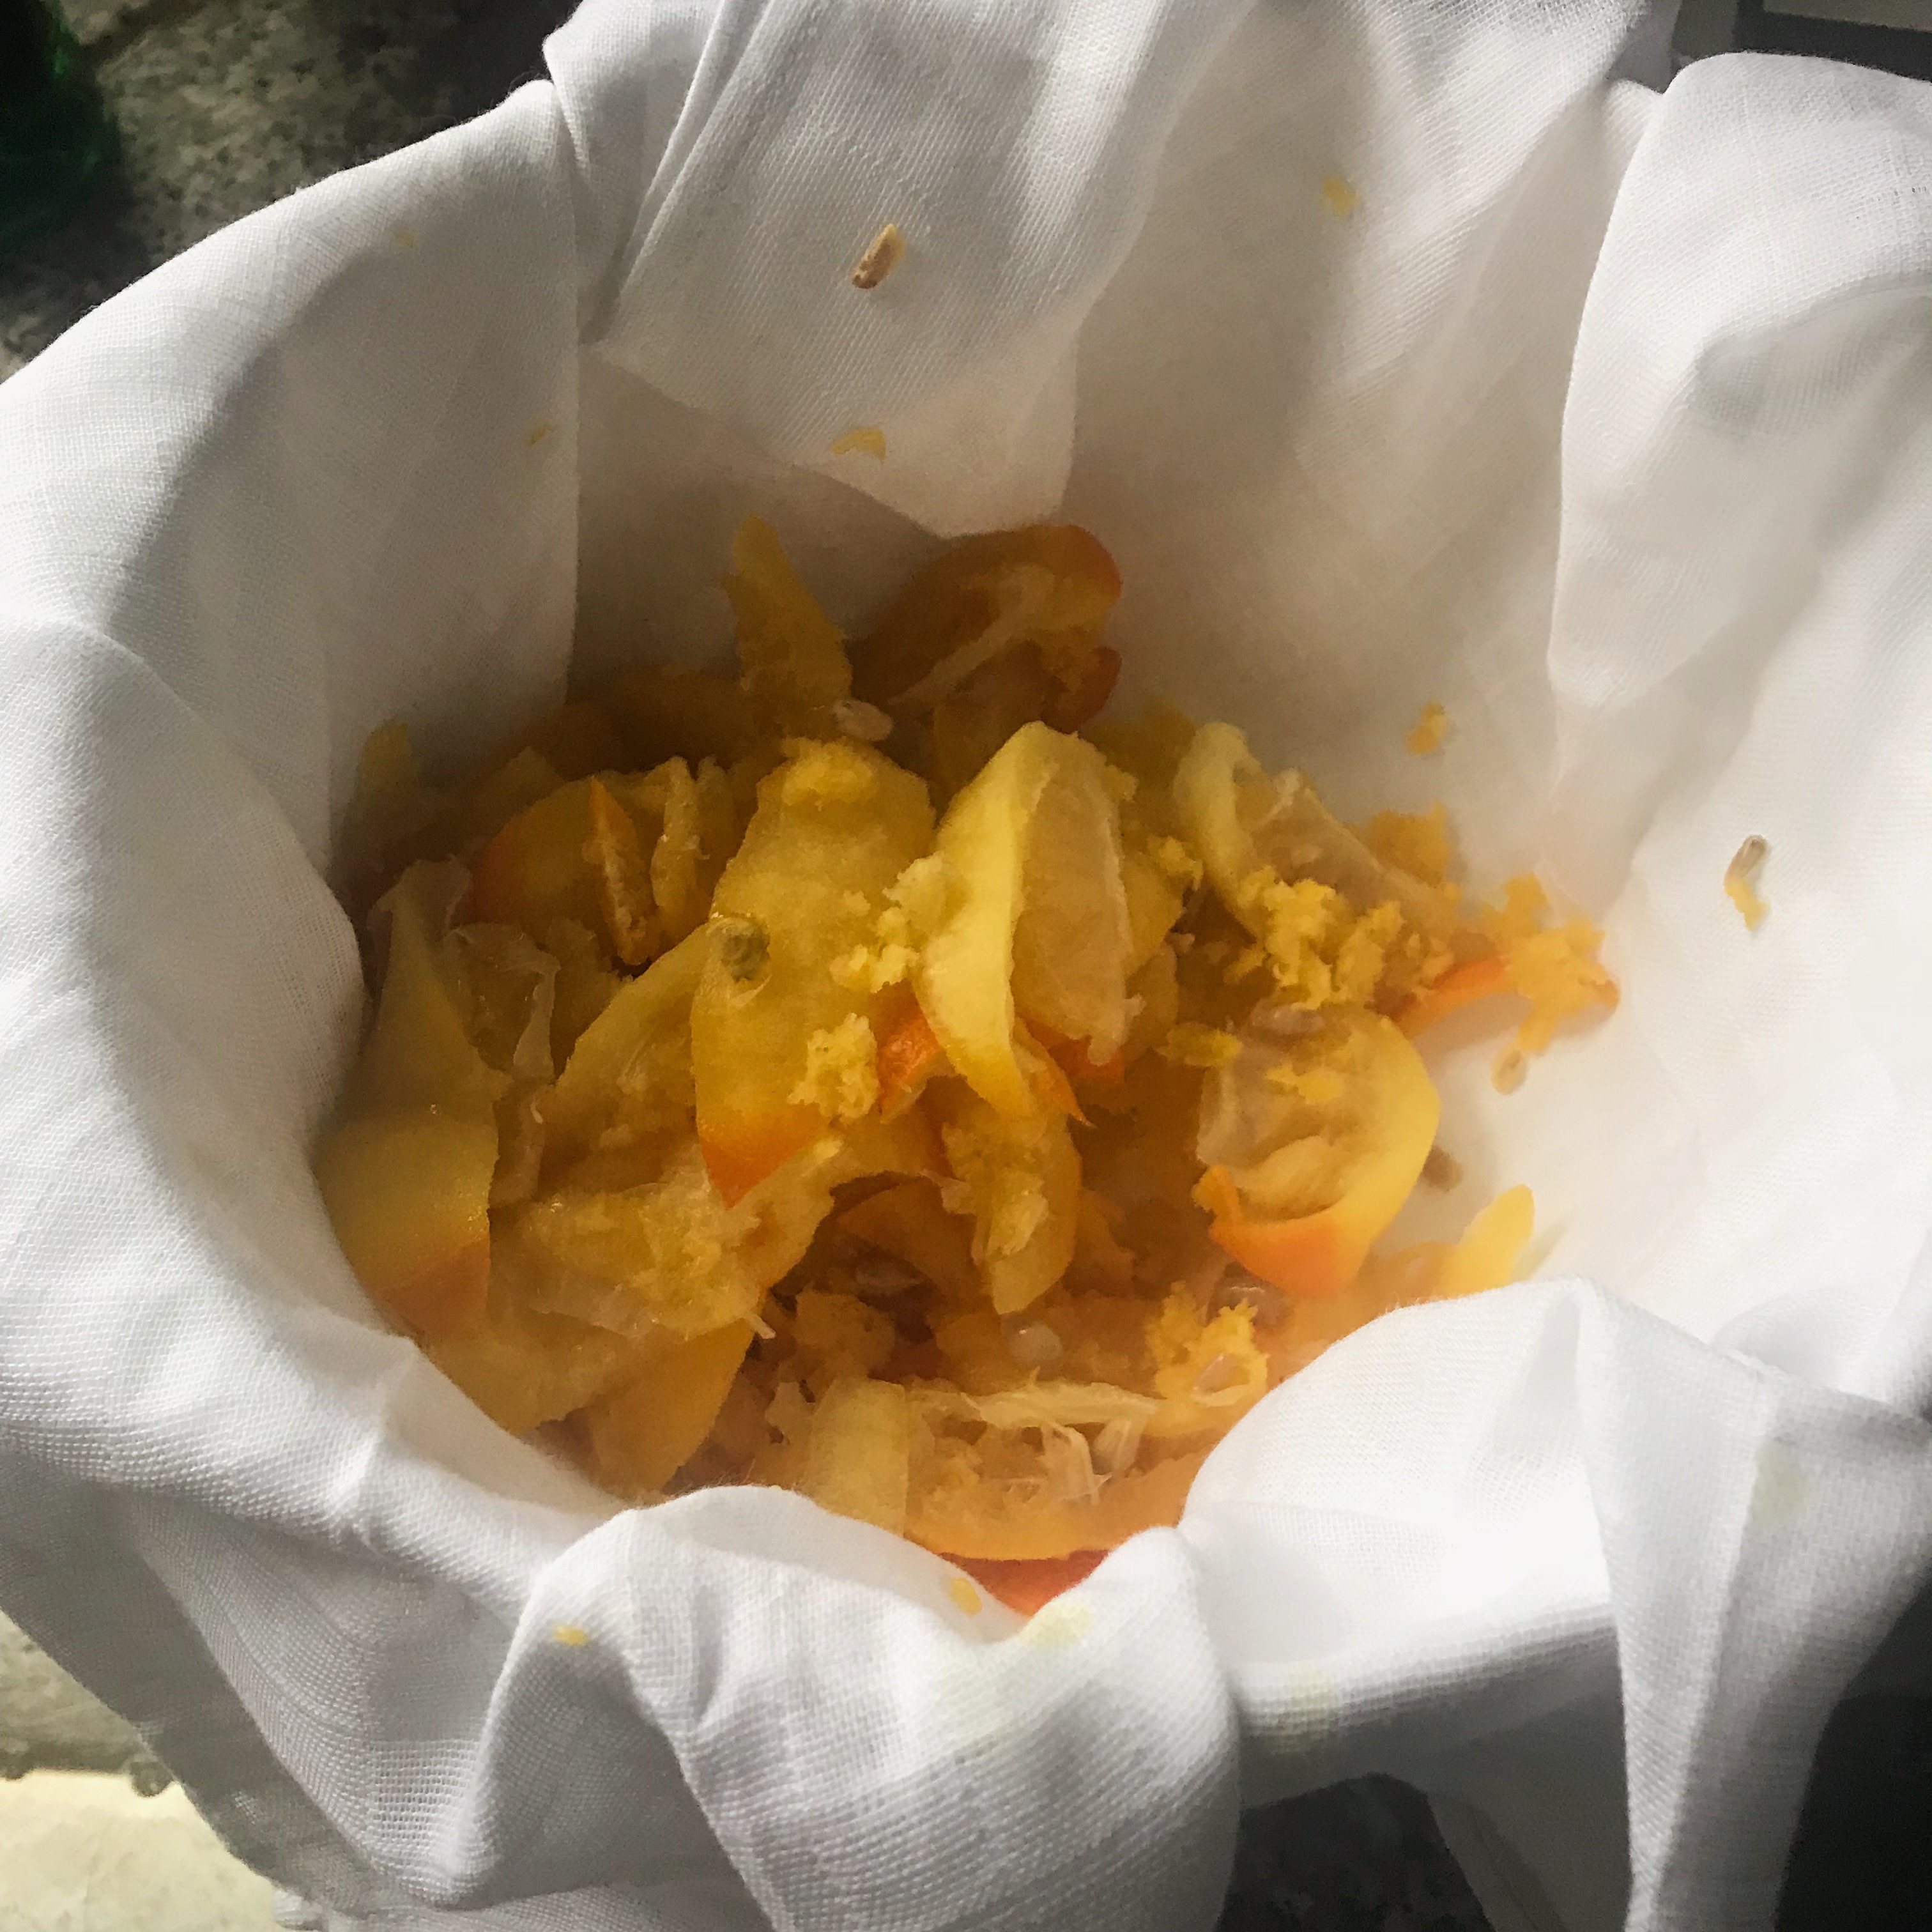
Flesh, pips & pith in muslin

Once cool, halve, and scoop out the flesh, pips/seeds & white pith with a tablespoon. Place these in another bowl lined with the muslin square.  These contain pectin, and are important as this will be key in obtaining a good set or gel like texture. Slice the soft peel/ rind into shreds with a sharp knife. I like a thick cut shred so cut mine into about  1/2 cm or  1/4 inch widths and 3 cm or 1 inch lengths.

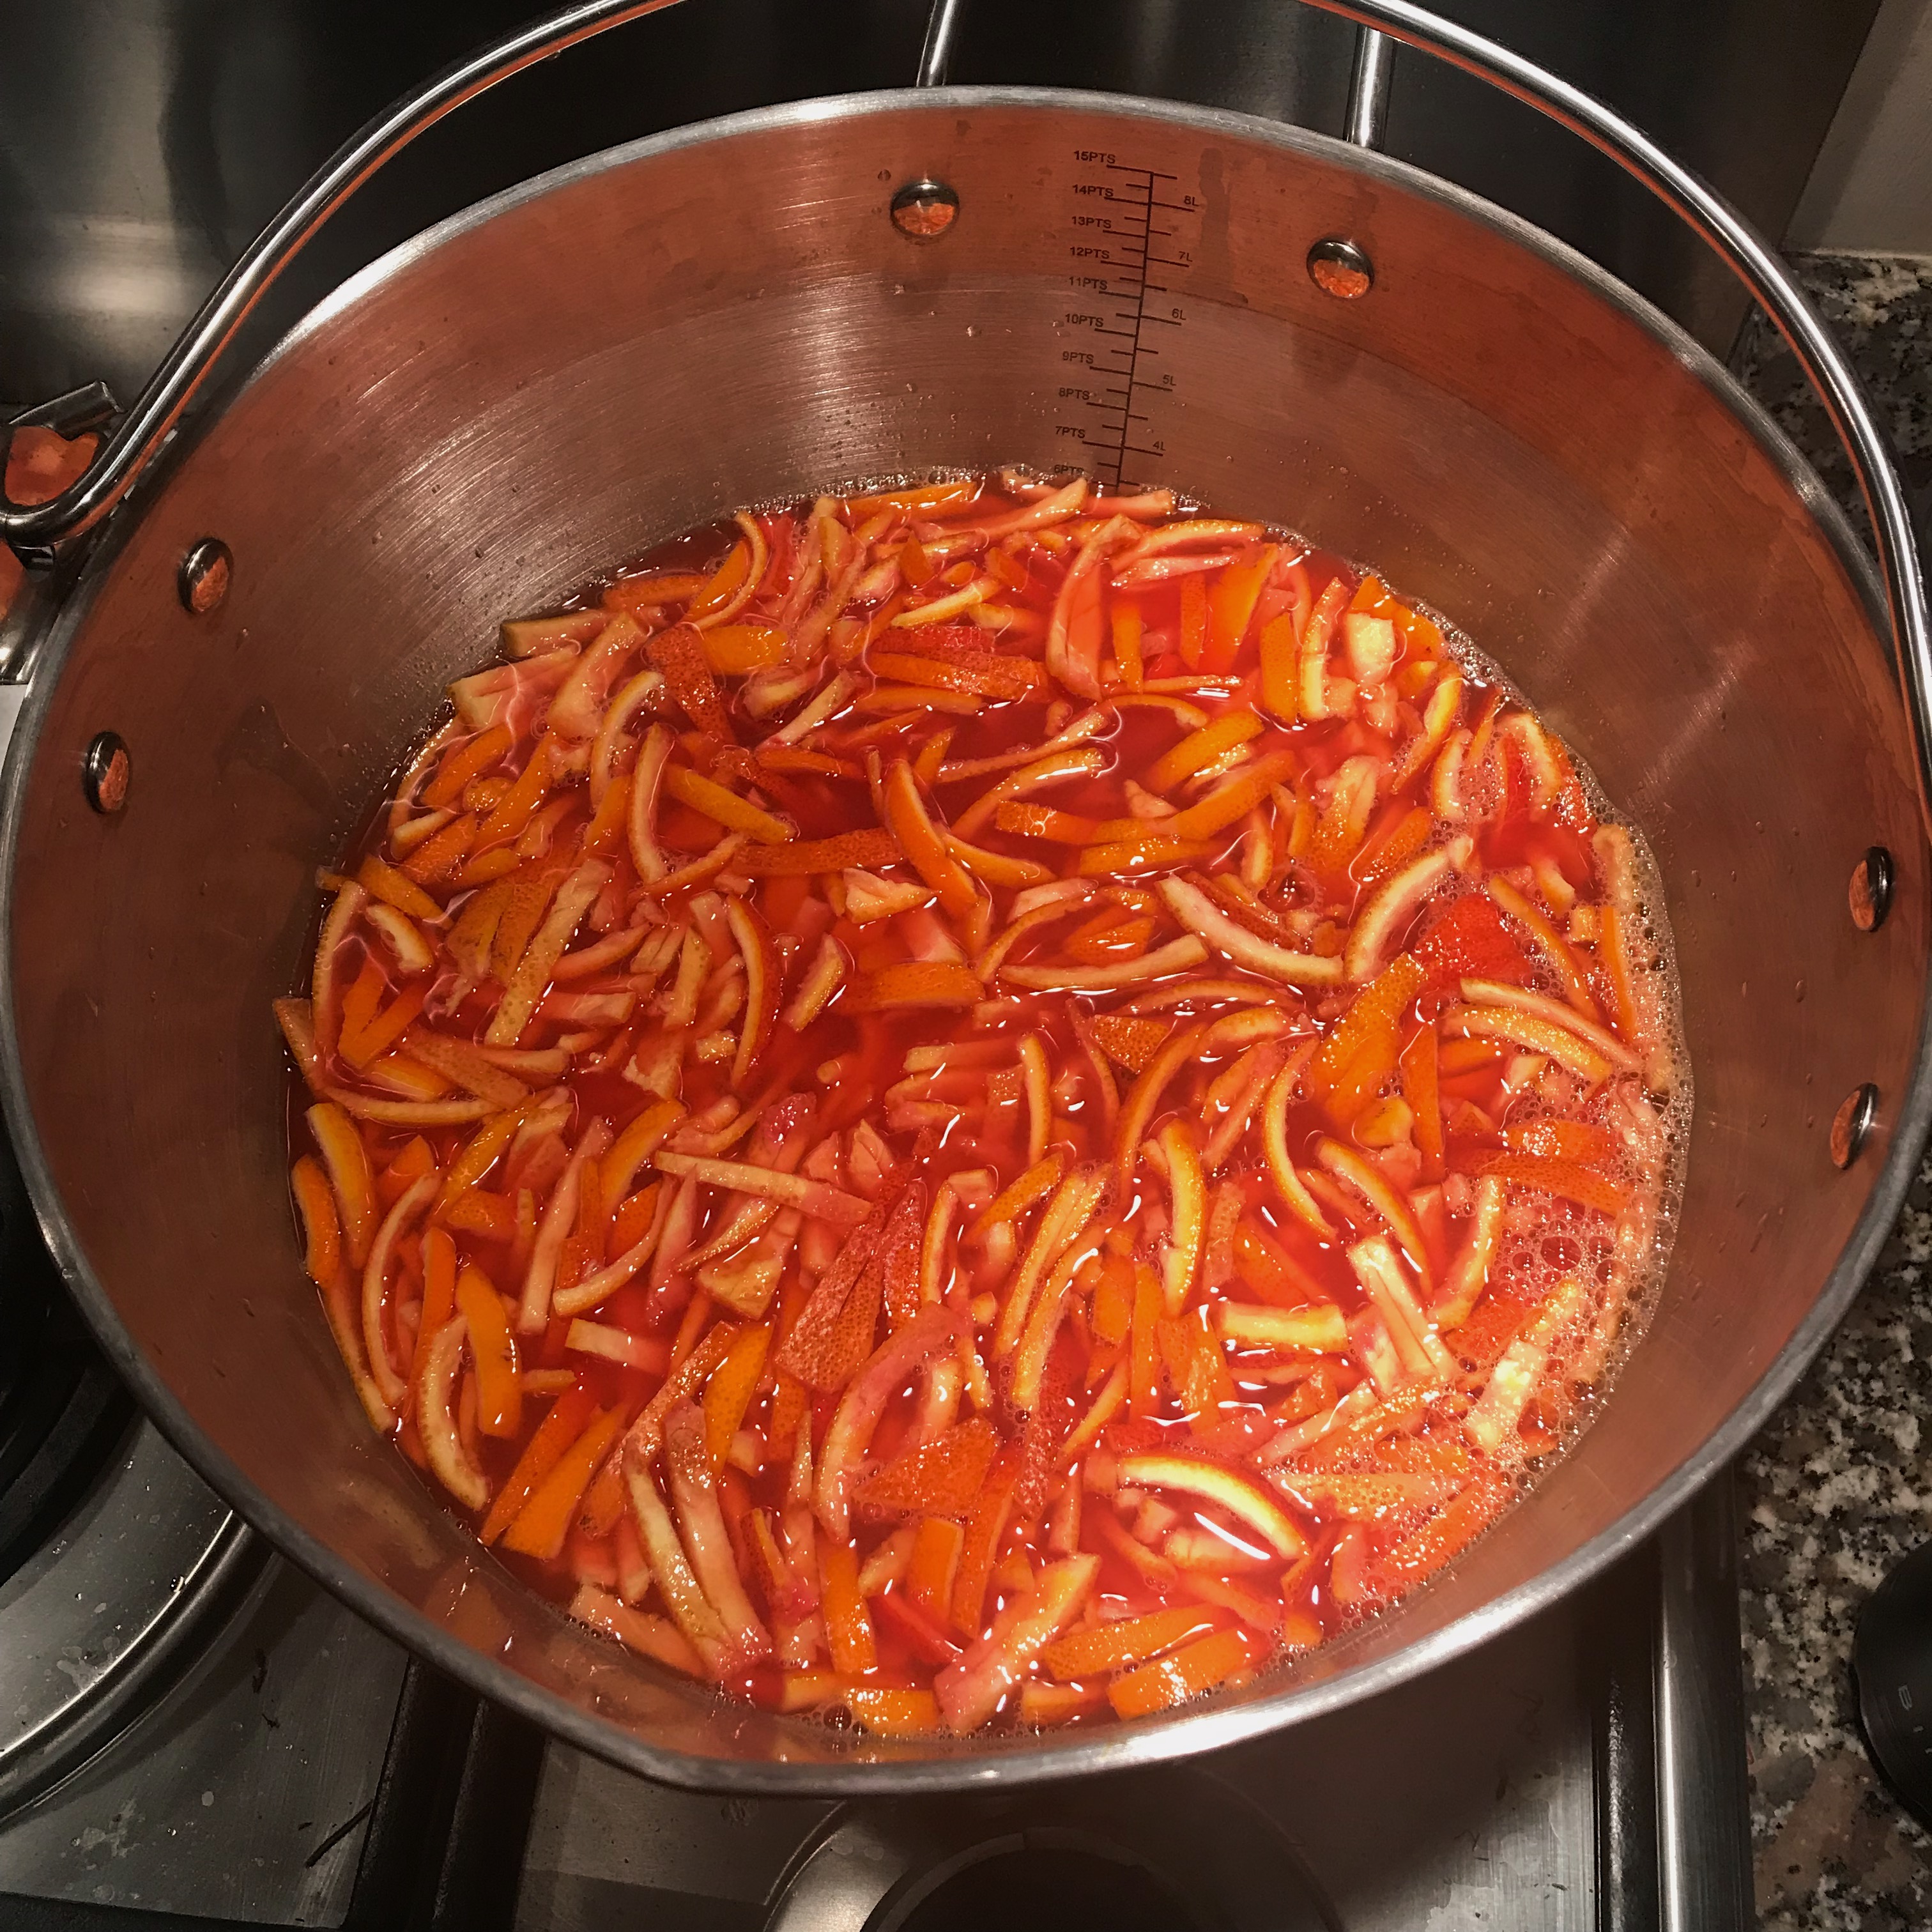
Juice and thick cut rind

You can roughly chop using a food processor to save time but I prefer the look of hand cut shreds. Squeeze the juice of 2 lemons and add to the orange cooking water, about 1.4 l or 3 pints liquid. If less just top up with water.  Remove the lemon pips and add to the orange pips, flesh & cooked pith in the muslin. Tie up the muslin tightly, use kitchen string if necessary and add to the pan of cooked orange juice/ water and lemon juice. Simmer on a low/medium heat for 45 minutes then remove from heat to cool.

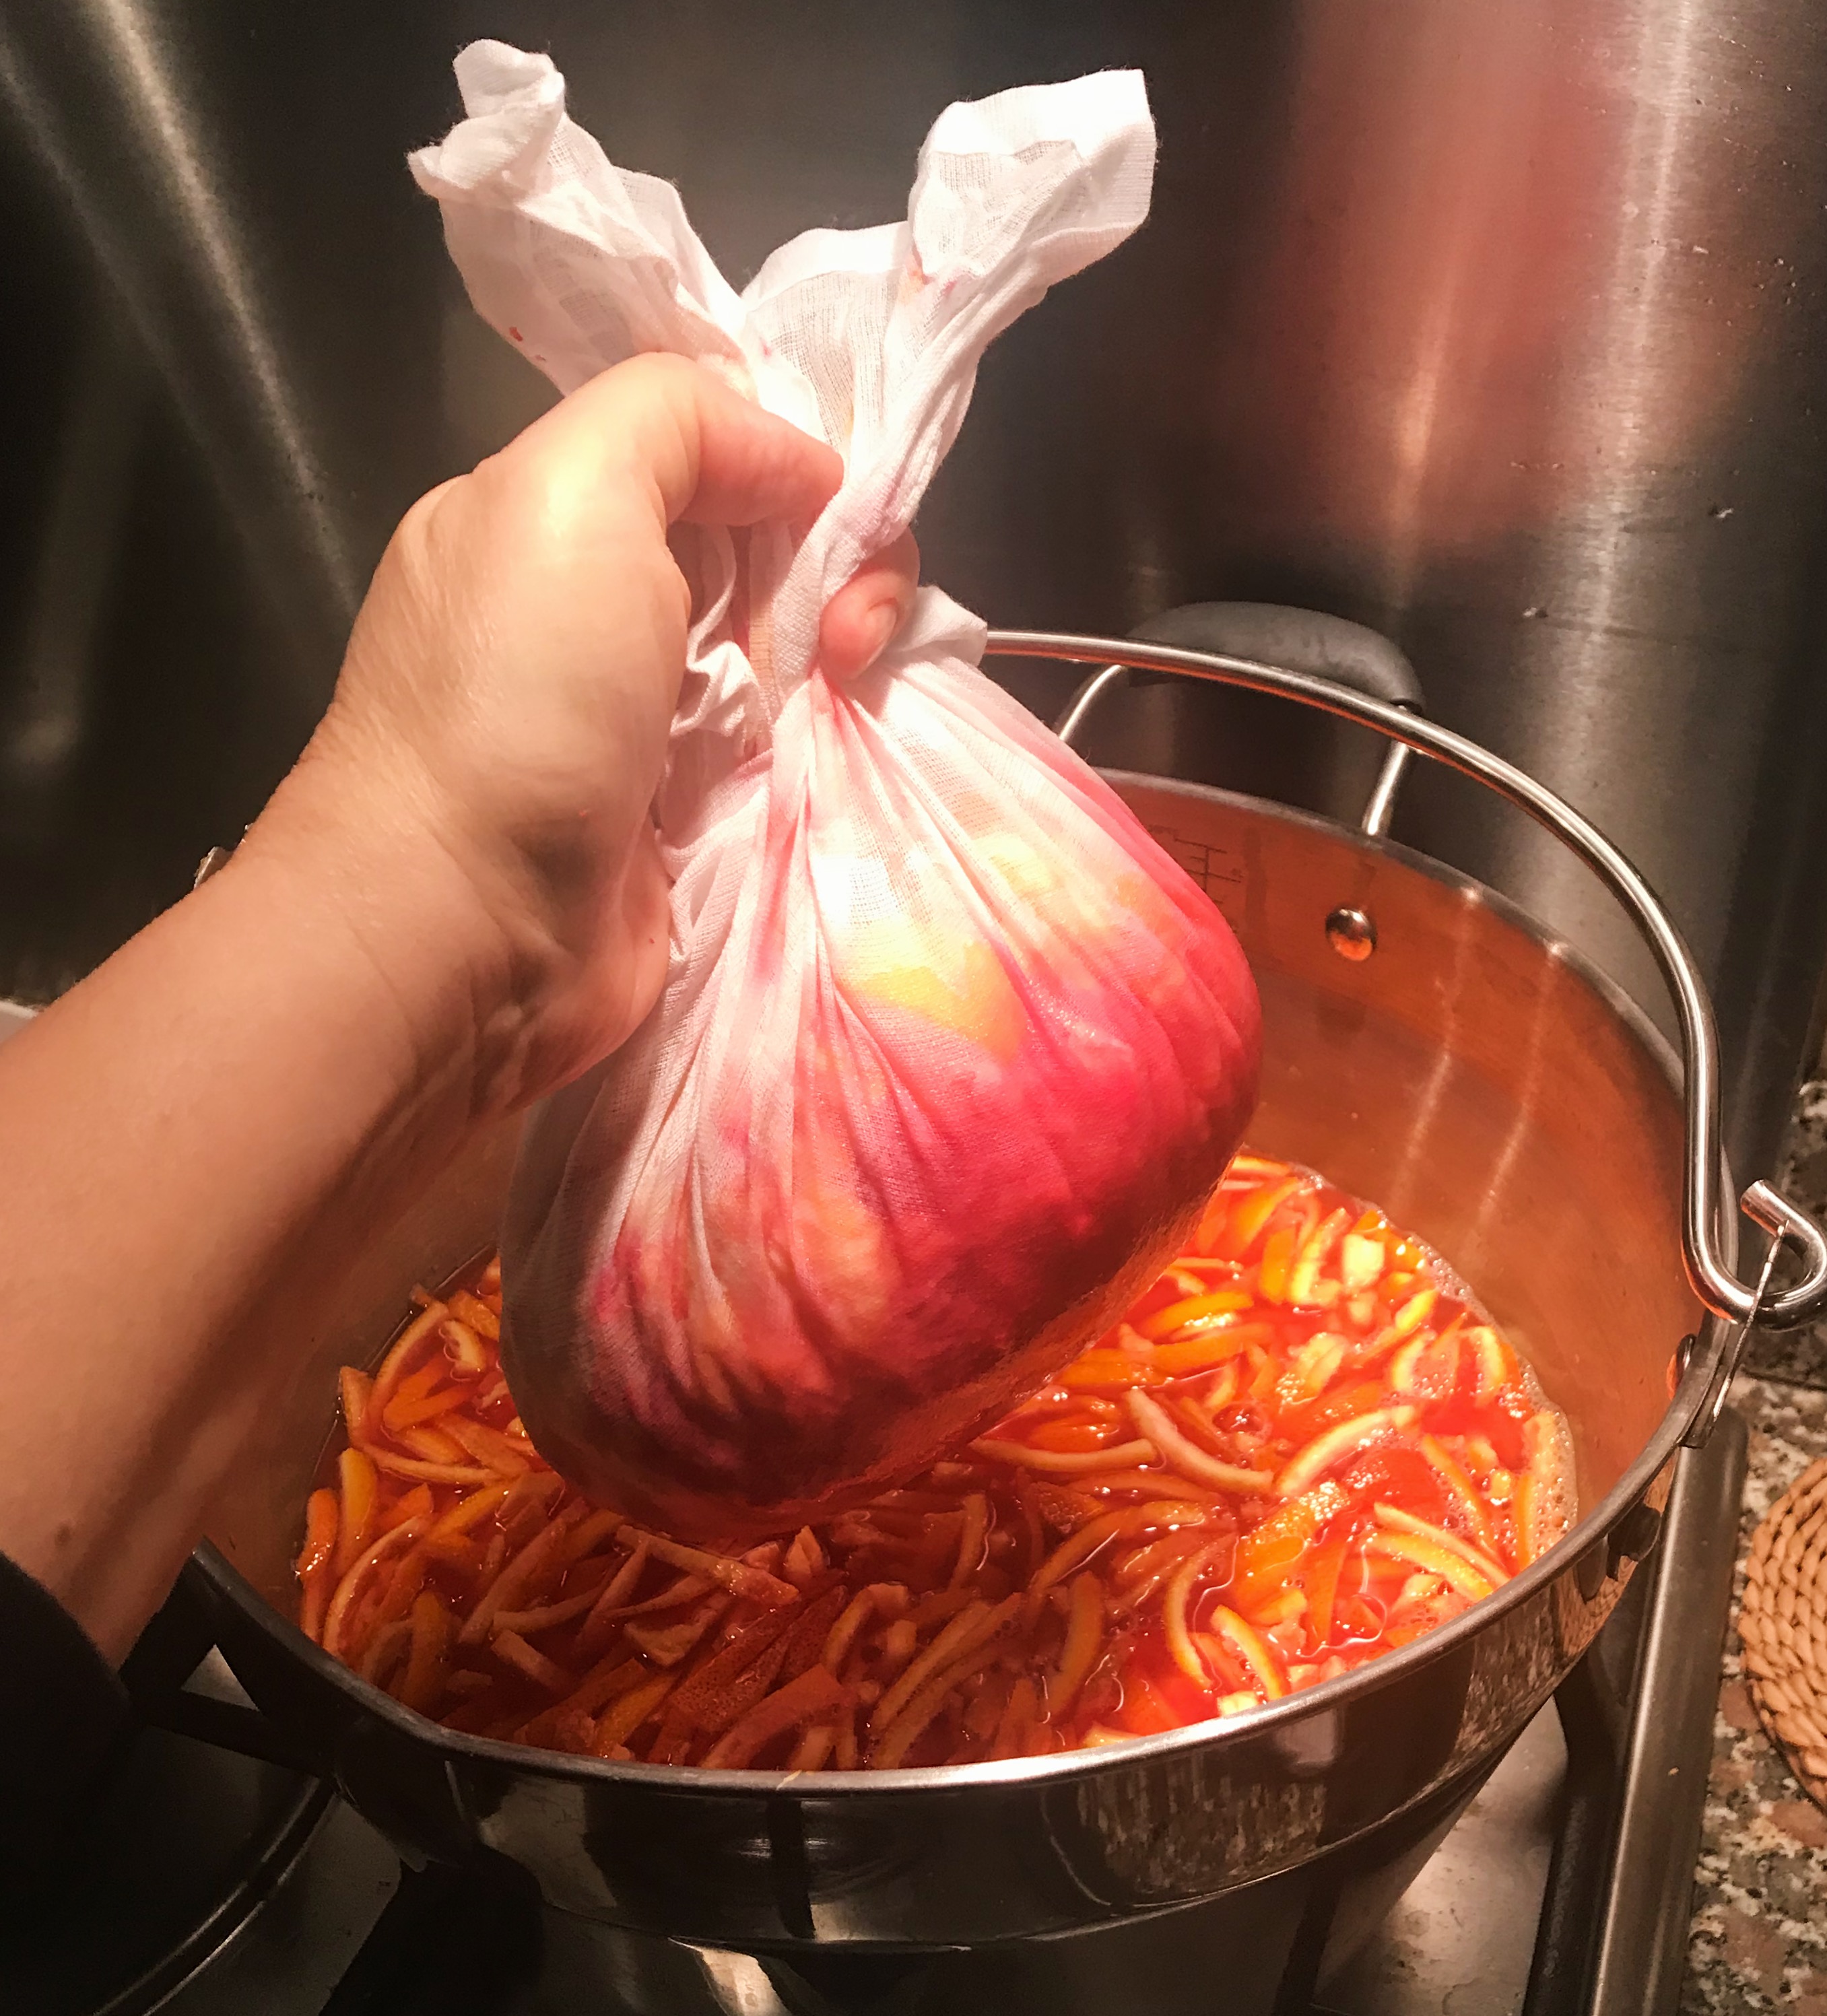
Cooled ready to squeeze muslin to extract pectin

If you have time you can leave this in a cool place overnight otherwise leave for a minimum of 1 hour. Remove & squeeze out the muslin tightly back into the pan. The juice will be slightly gel- like which is the pectin, the gelling agent naturally present in the oranges & lemon pips and pith. Discard the contents of the muslin- makes fragrant compost! You can wash and re use the muslin. Heat the pan on a medium heat until the liquid is hot then add the granulated and muscovado sugar (if using). Allow to fully dissolve for about 10 -15 minutes without stirring, then turn up the heat to medium hot and bring to the boil.

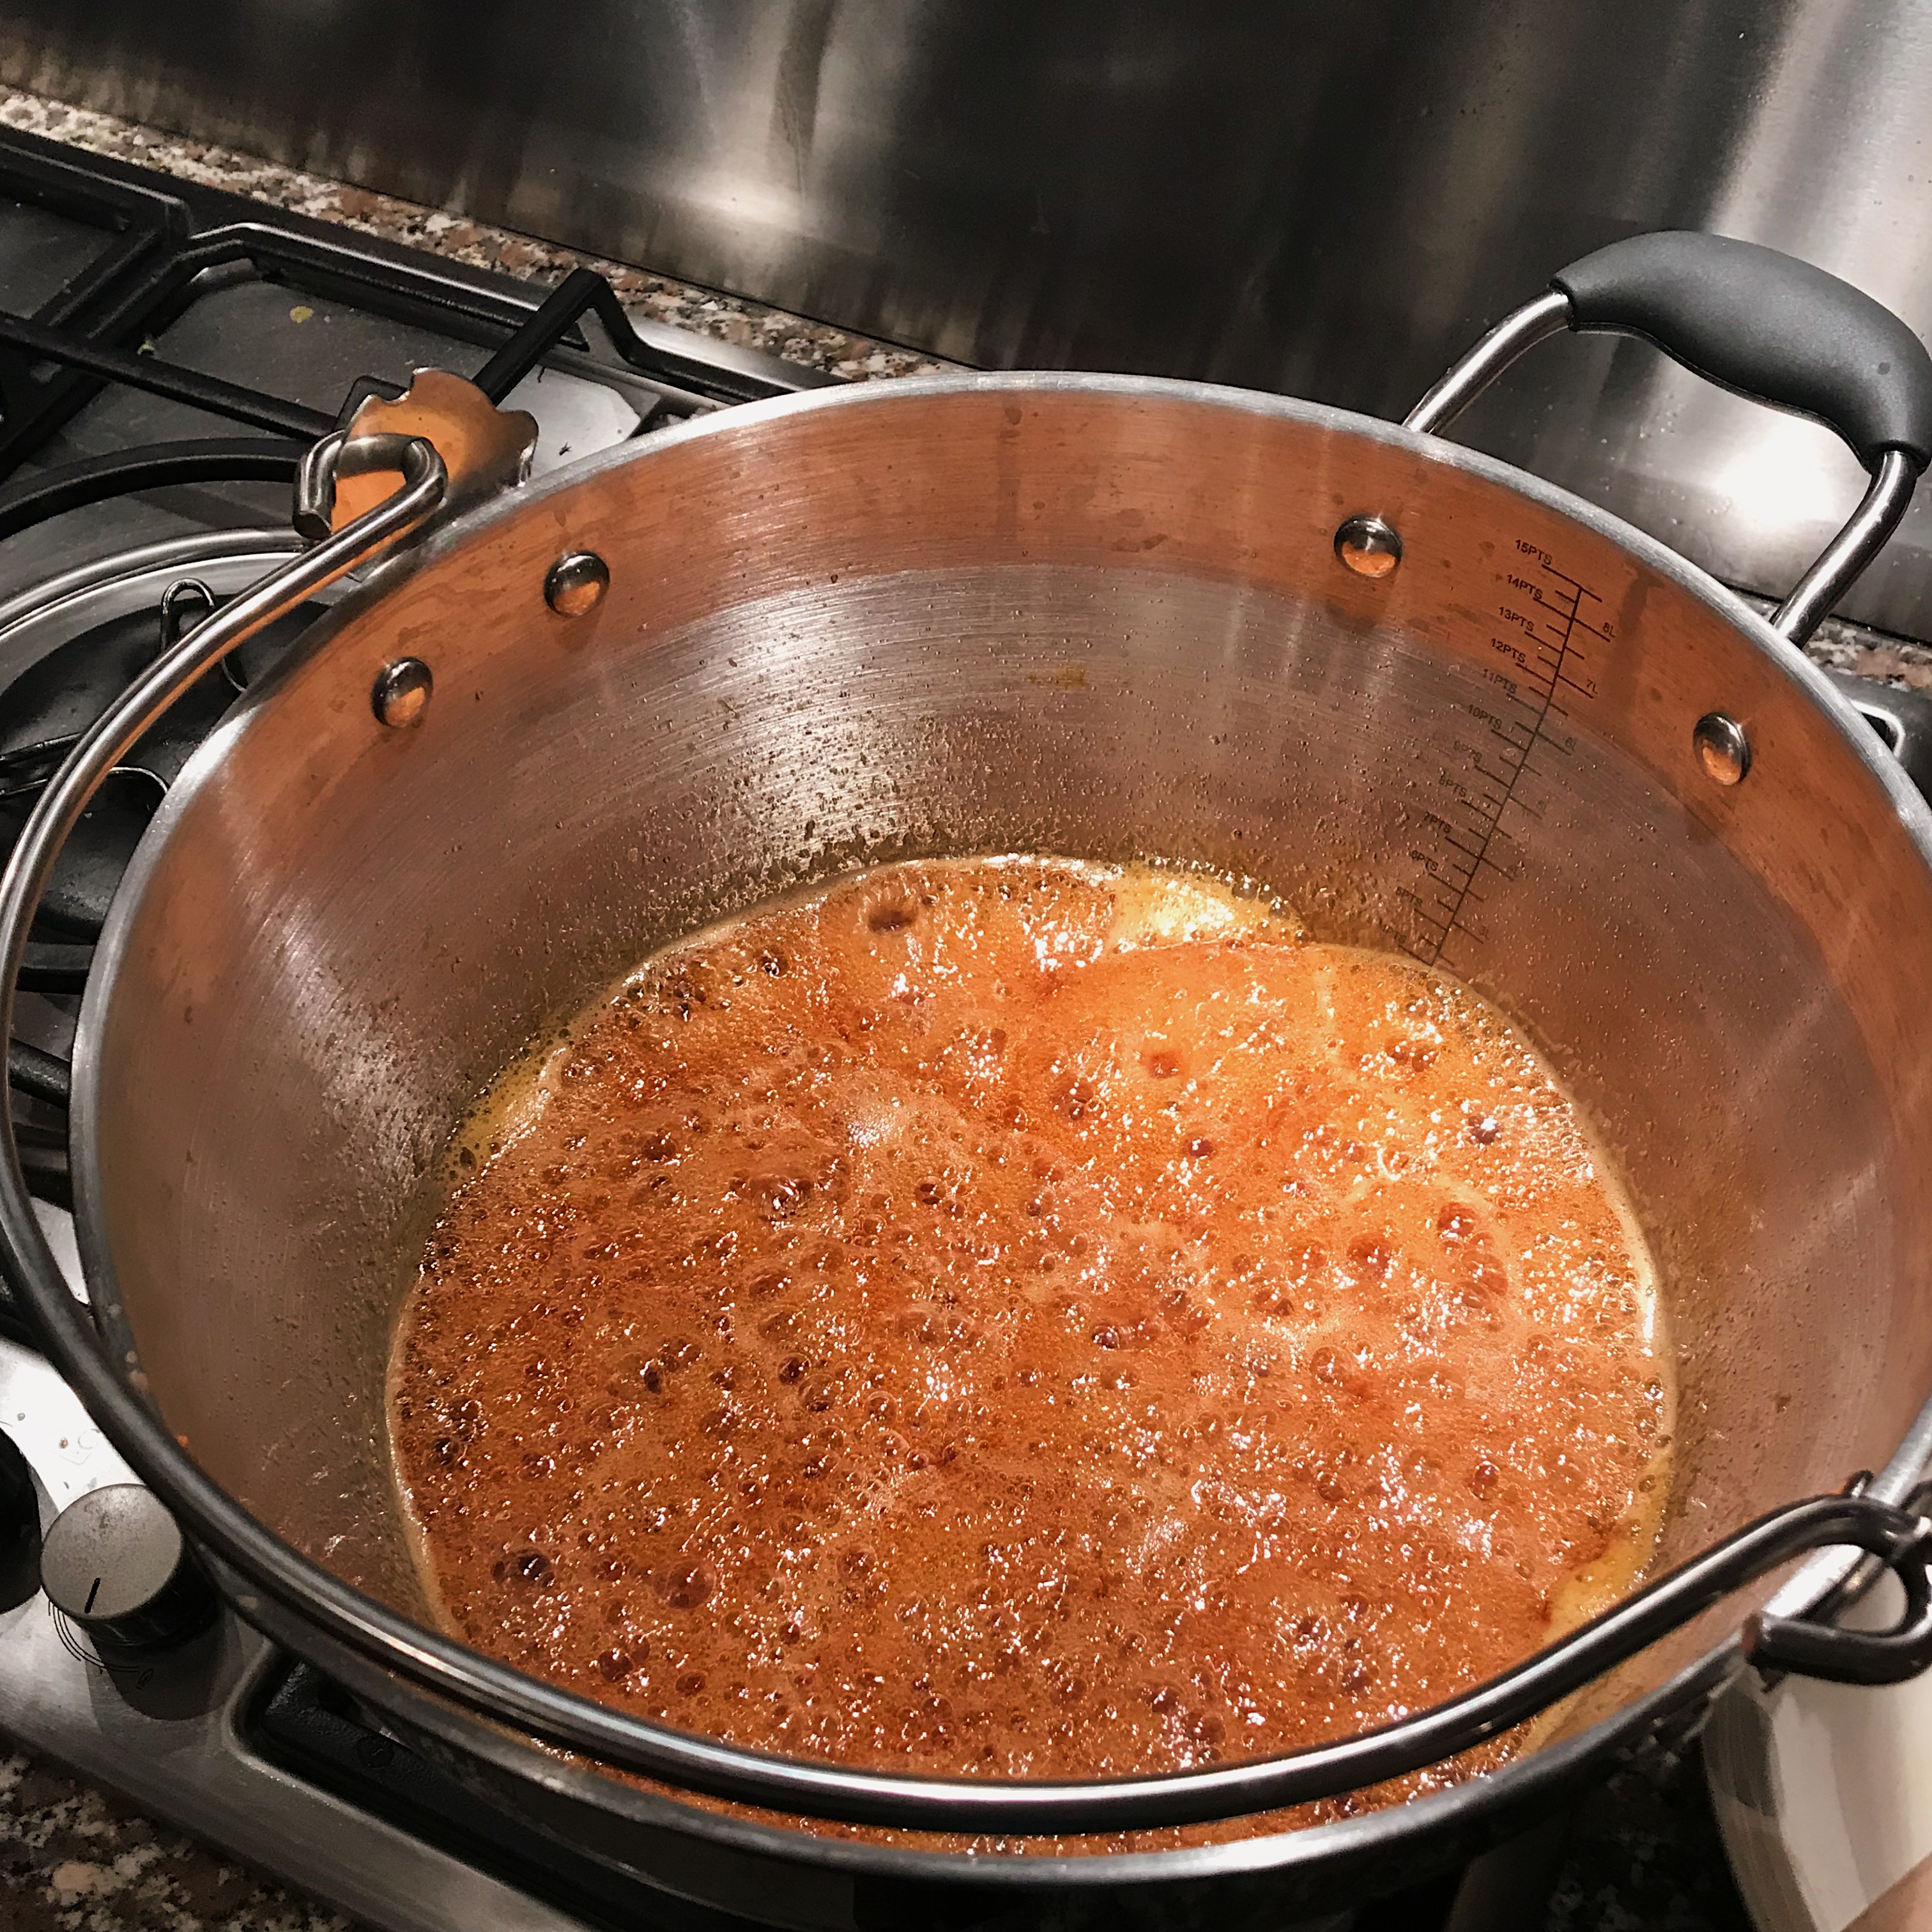
Marmalade boiling approaching set point

Keep boiling on a rolling boil ( see photo). You now want to keep boiling until you reach the set point. This should take around 20 -30 minutes but it will vary. Give the liquid an occasional stir to ensure it is not catching on the bottom of the pan. Meanwhile prepare the clean jam jars & lids for sterilising. I use Kilner glass jars with the 2 piece lids. I set my oven to 160C /320F fan, place the upright glass jars and outer rings on metal baking trays and heat for 10 minutes. For the inner lid with the rubber rim, follow the instructions as the rubber cannot withstand boiling water or temperatures above 82C/180F. If using a metal only lid these can be sterilised in the oven along with the glass jars.  If you have a jam thermometer  the marmalade set point is 104.5C/220F.
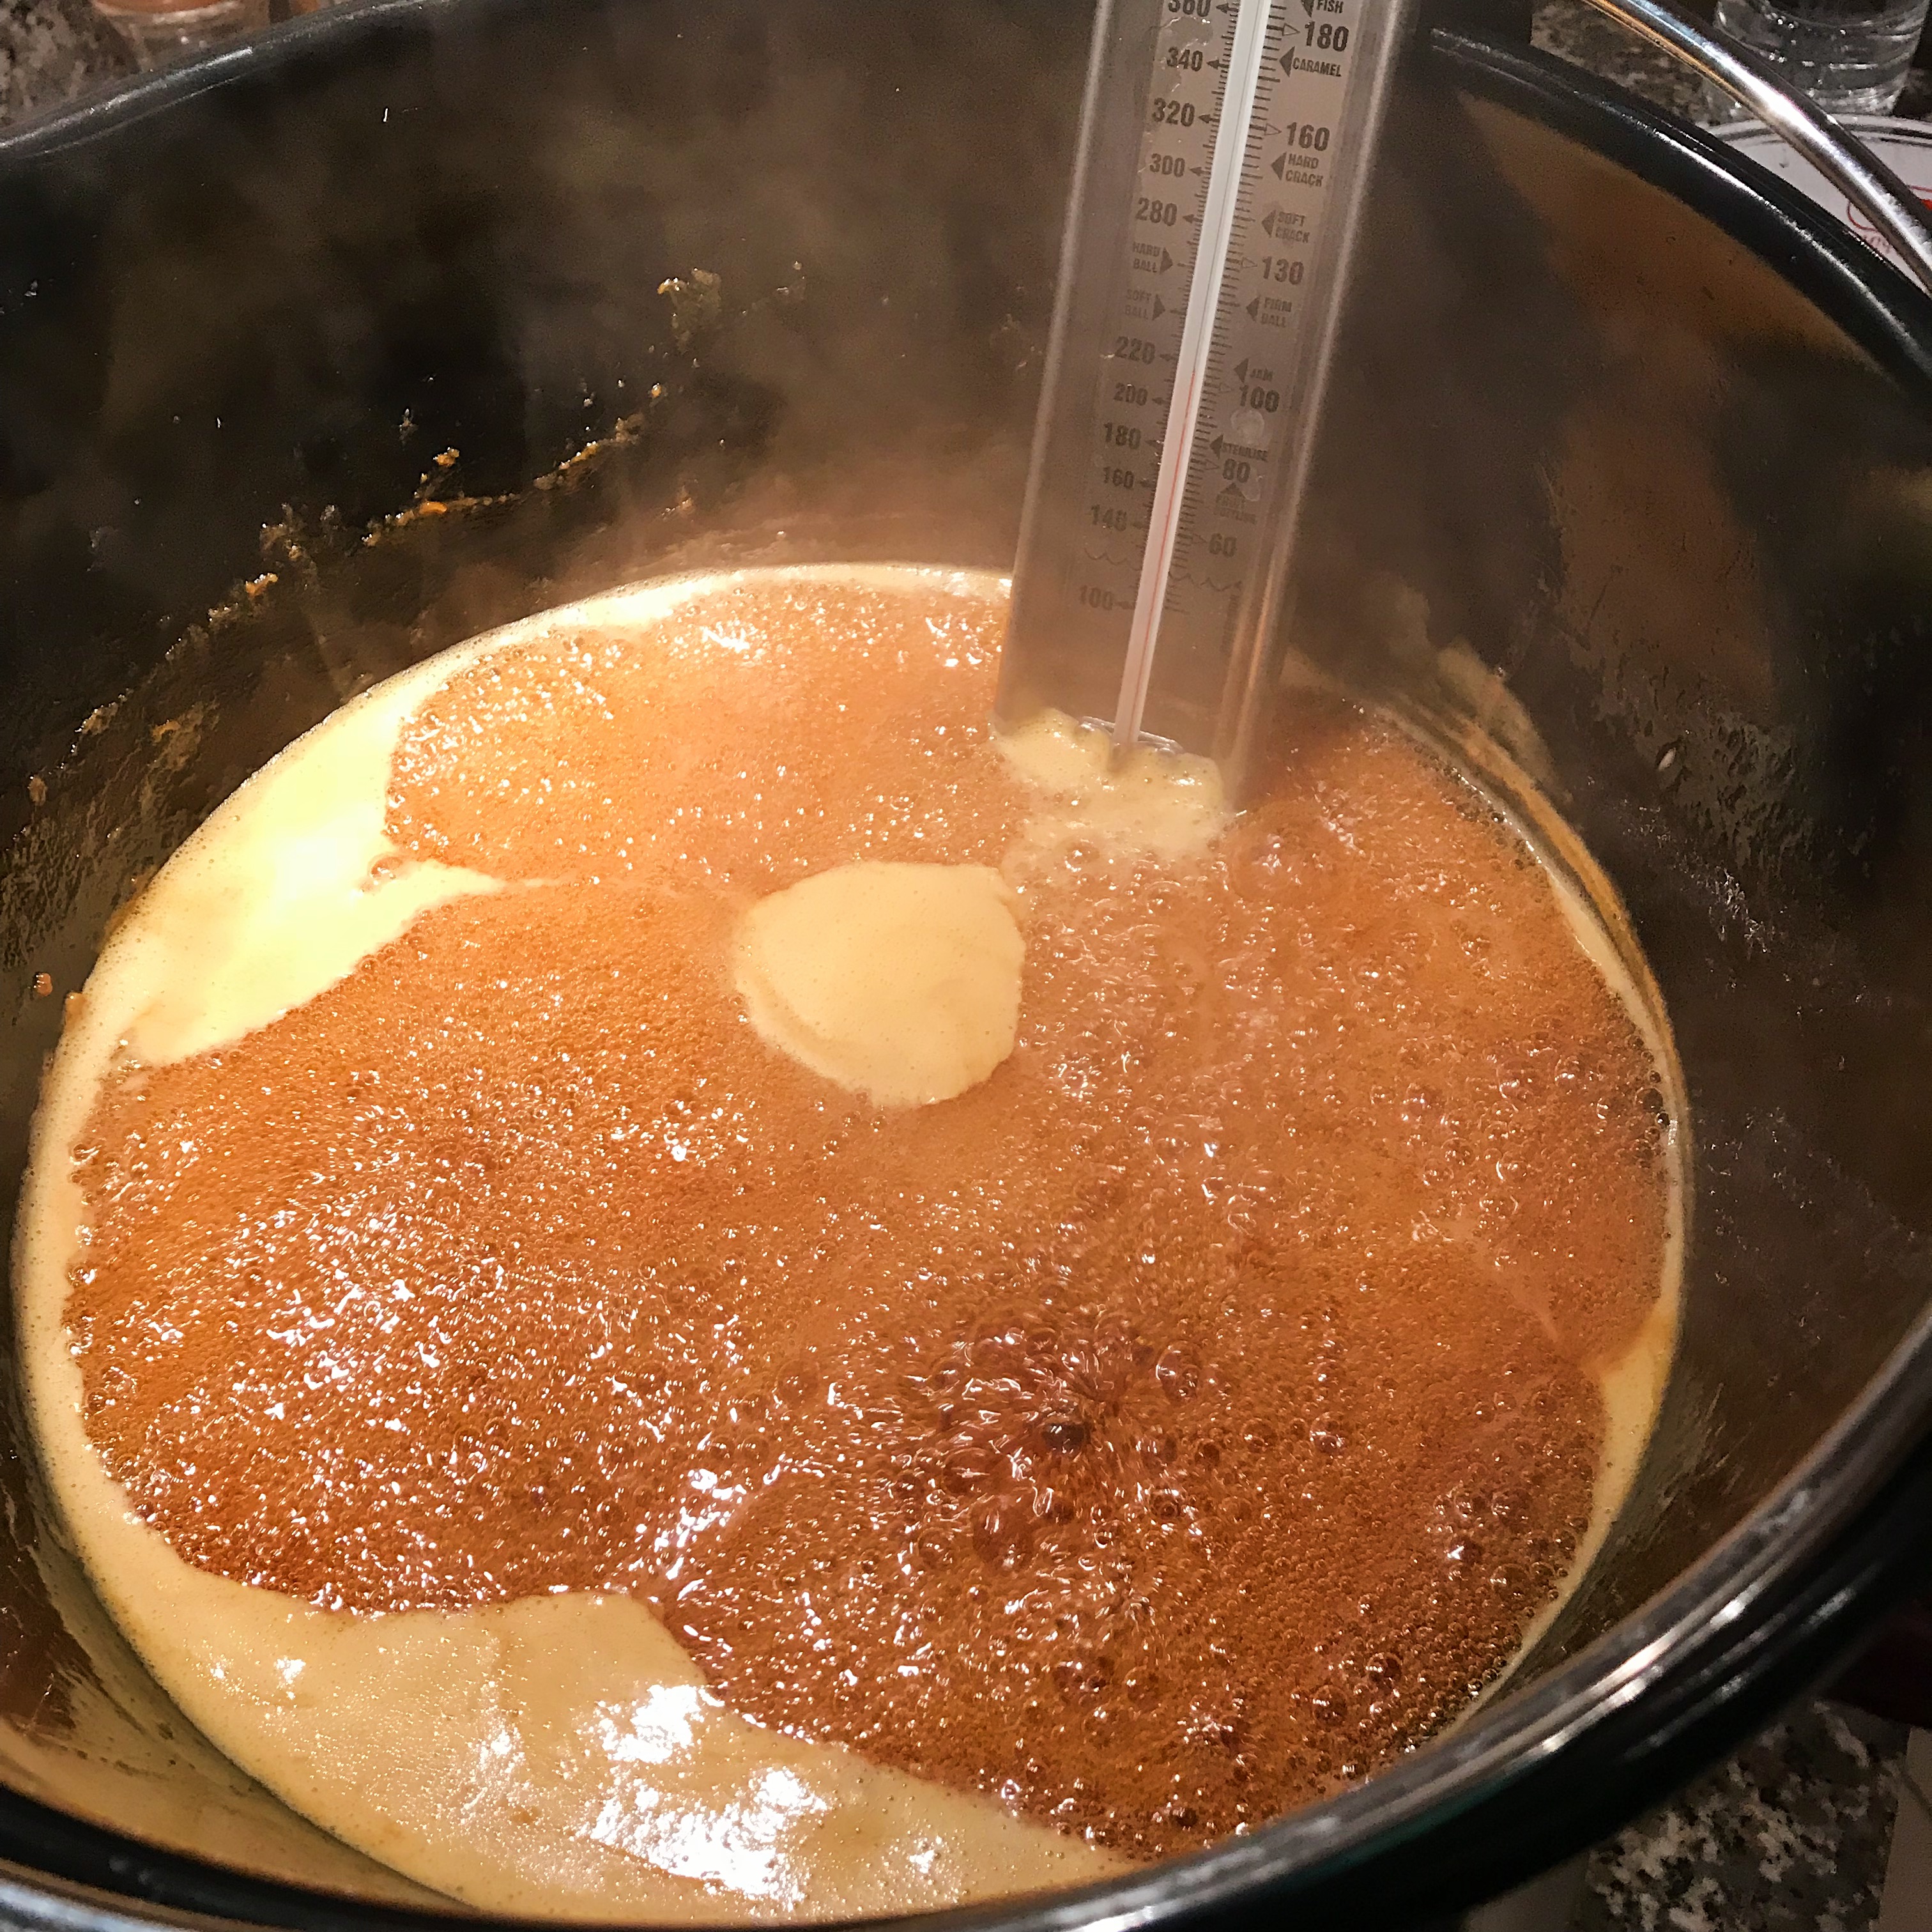
Set point there!

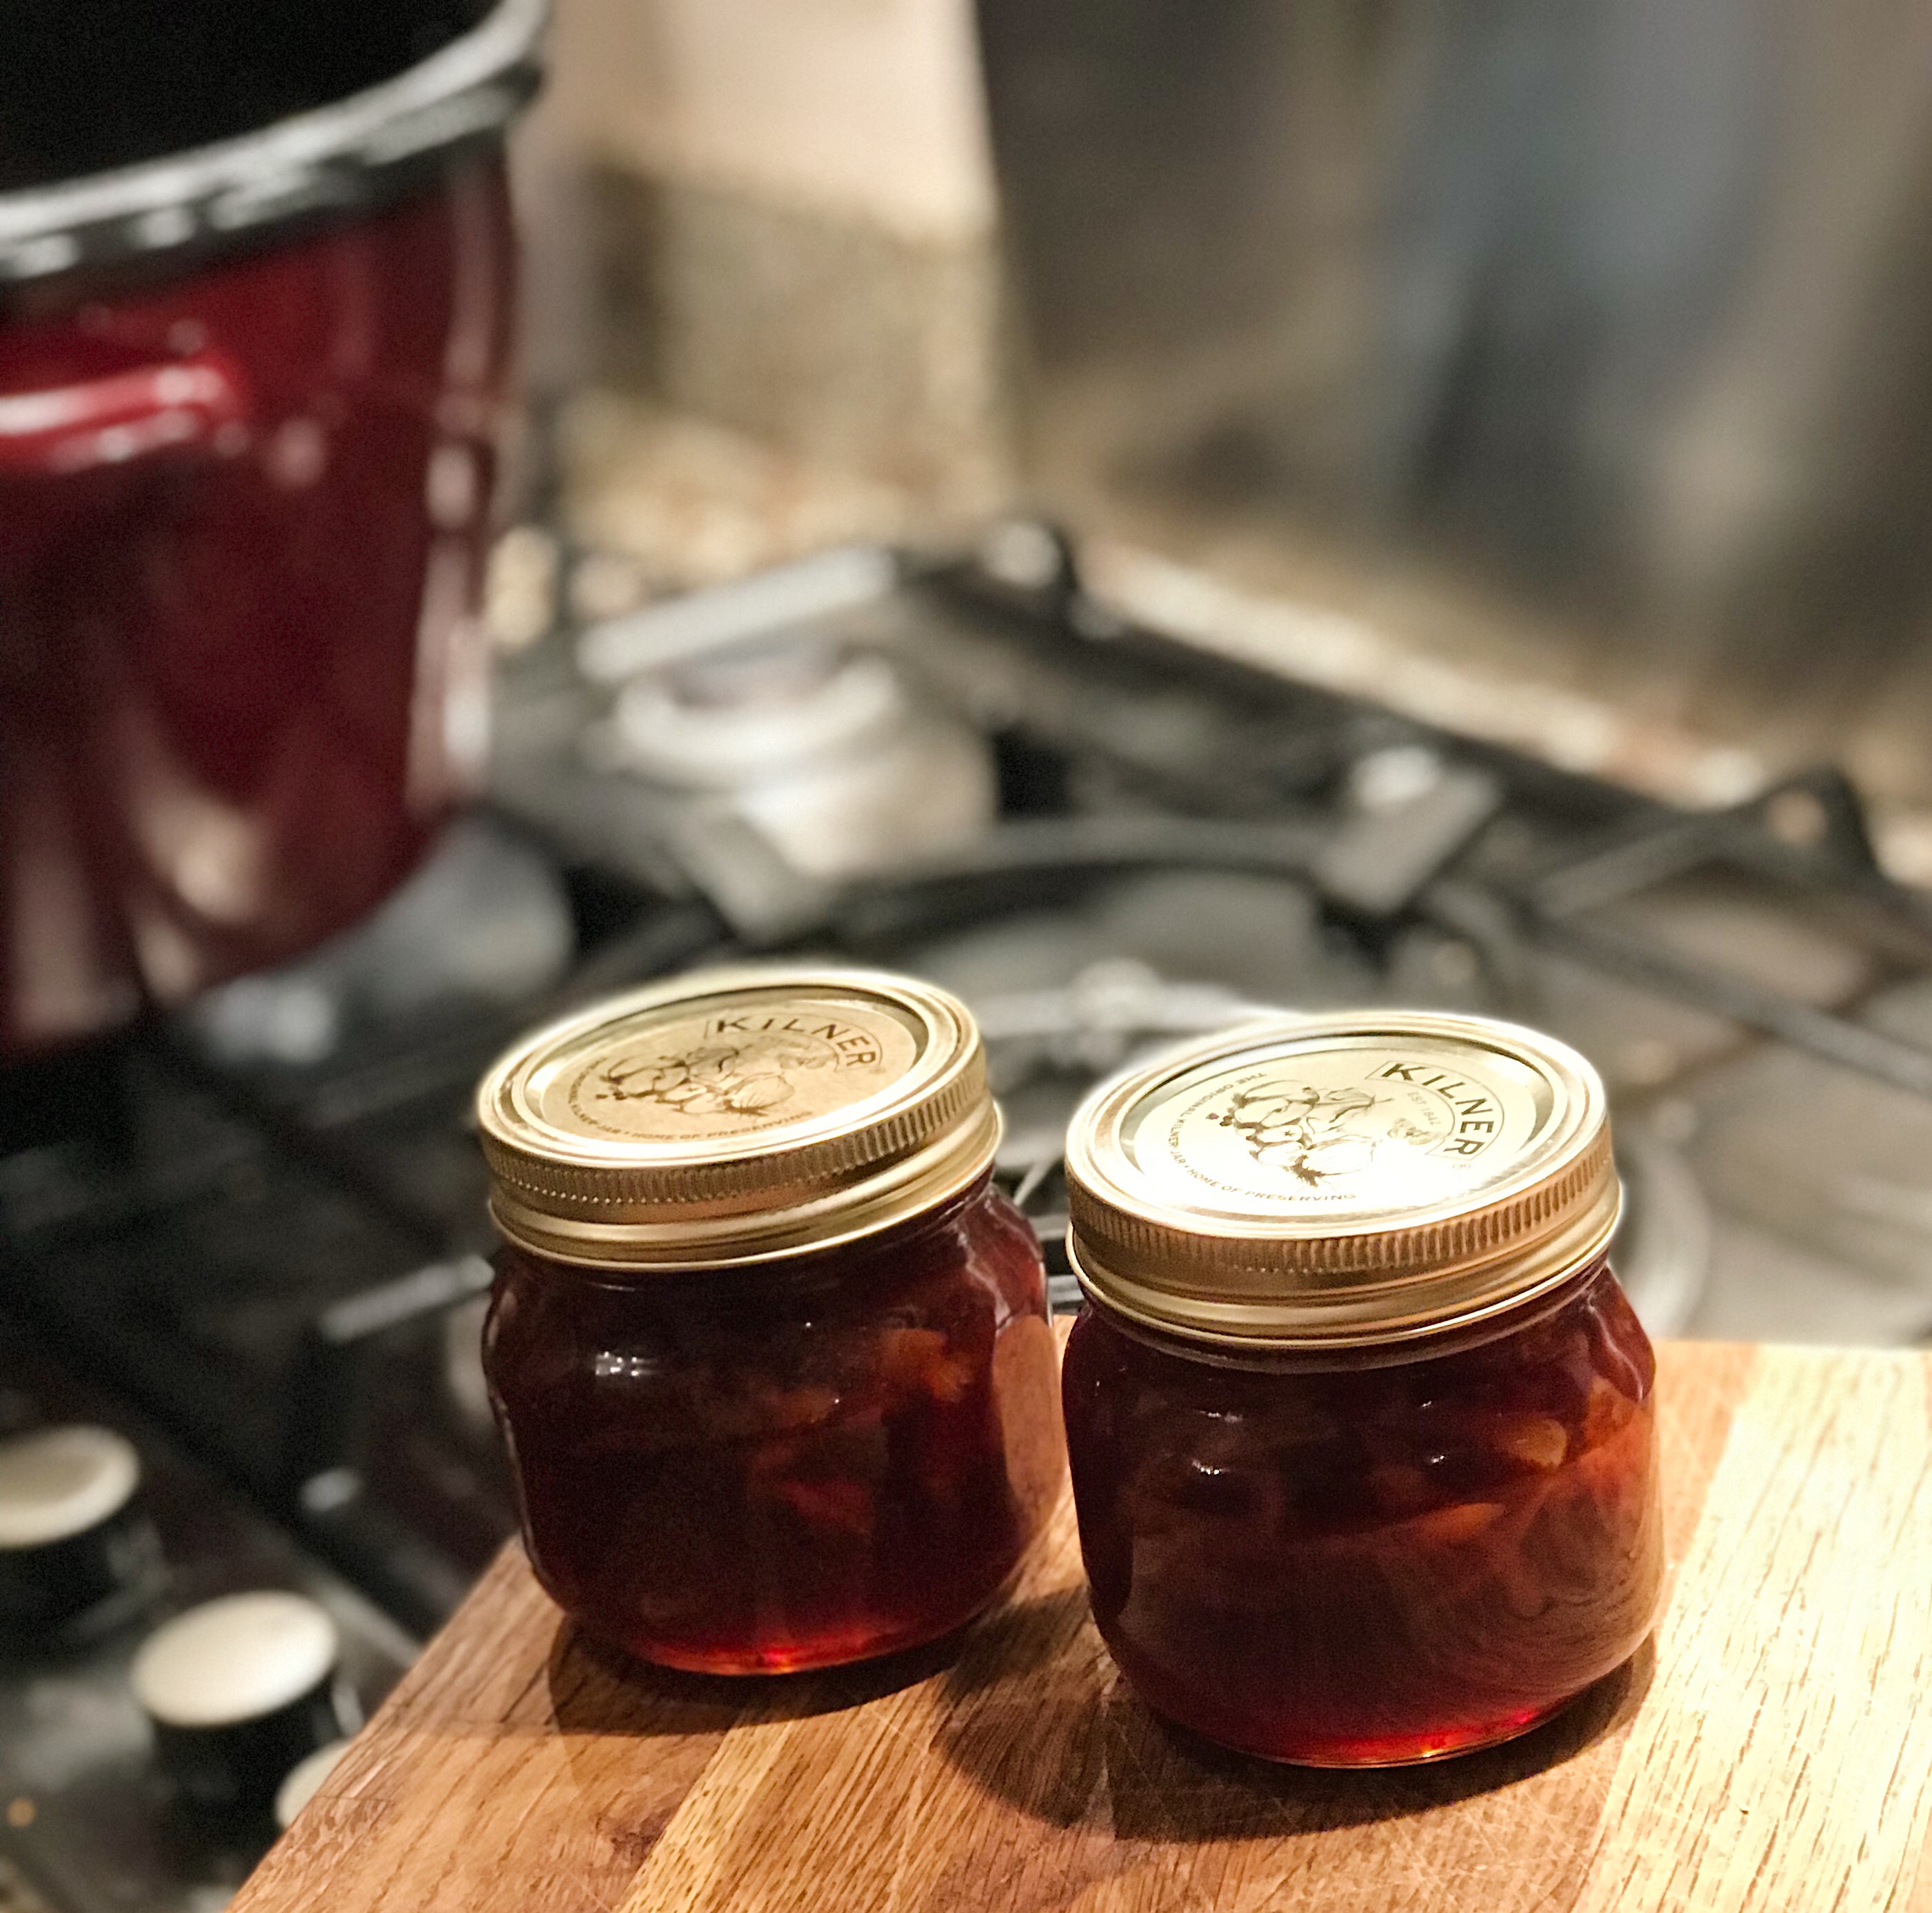
If not see my photos, the mixture will be rapidly boiling, rising up the pan. To test the set point, place a saucer in the freezer for a few minutes. Using a metal spoon taking care as the mixture is extremely hot, place a few drops of marmalade onto the saucer and leave to cool for 2 minutes. If you push your finger through the marmalade and it wrinkles the set point has been reached. If not continue boiling and test again in 5 minutes and repeat if necessary until set point achieved.  Remove the sterilised jars and lids from the oven. Once the set point has been reached, turn off the heat and leave the marmalade for 5-10 minutes. This ensures the peel is evenly distributed throughout as it cools and thickens. Carefully skim off any pale scum on the surface & discard. Then add the whisky if using and stir to mix in. Ensure all utensils are sterilised with boiling water and cooled on a metal tray lined with a clean cloth or paper towel. Once ready to fill use the  jam funnel or metal spoon/ ladle  to fill leaving the jars on the metal tray to catch any drips. Fill right up to the top to allow as little headspace as possible. Screw on the lids using heatproof gloves until tight. Leave the jars on the tray to cool overnight. Give the jars a final tighten, clean off any drips, label when the jars are cool and store in a dark cupboard.

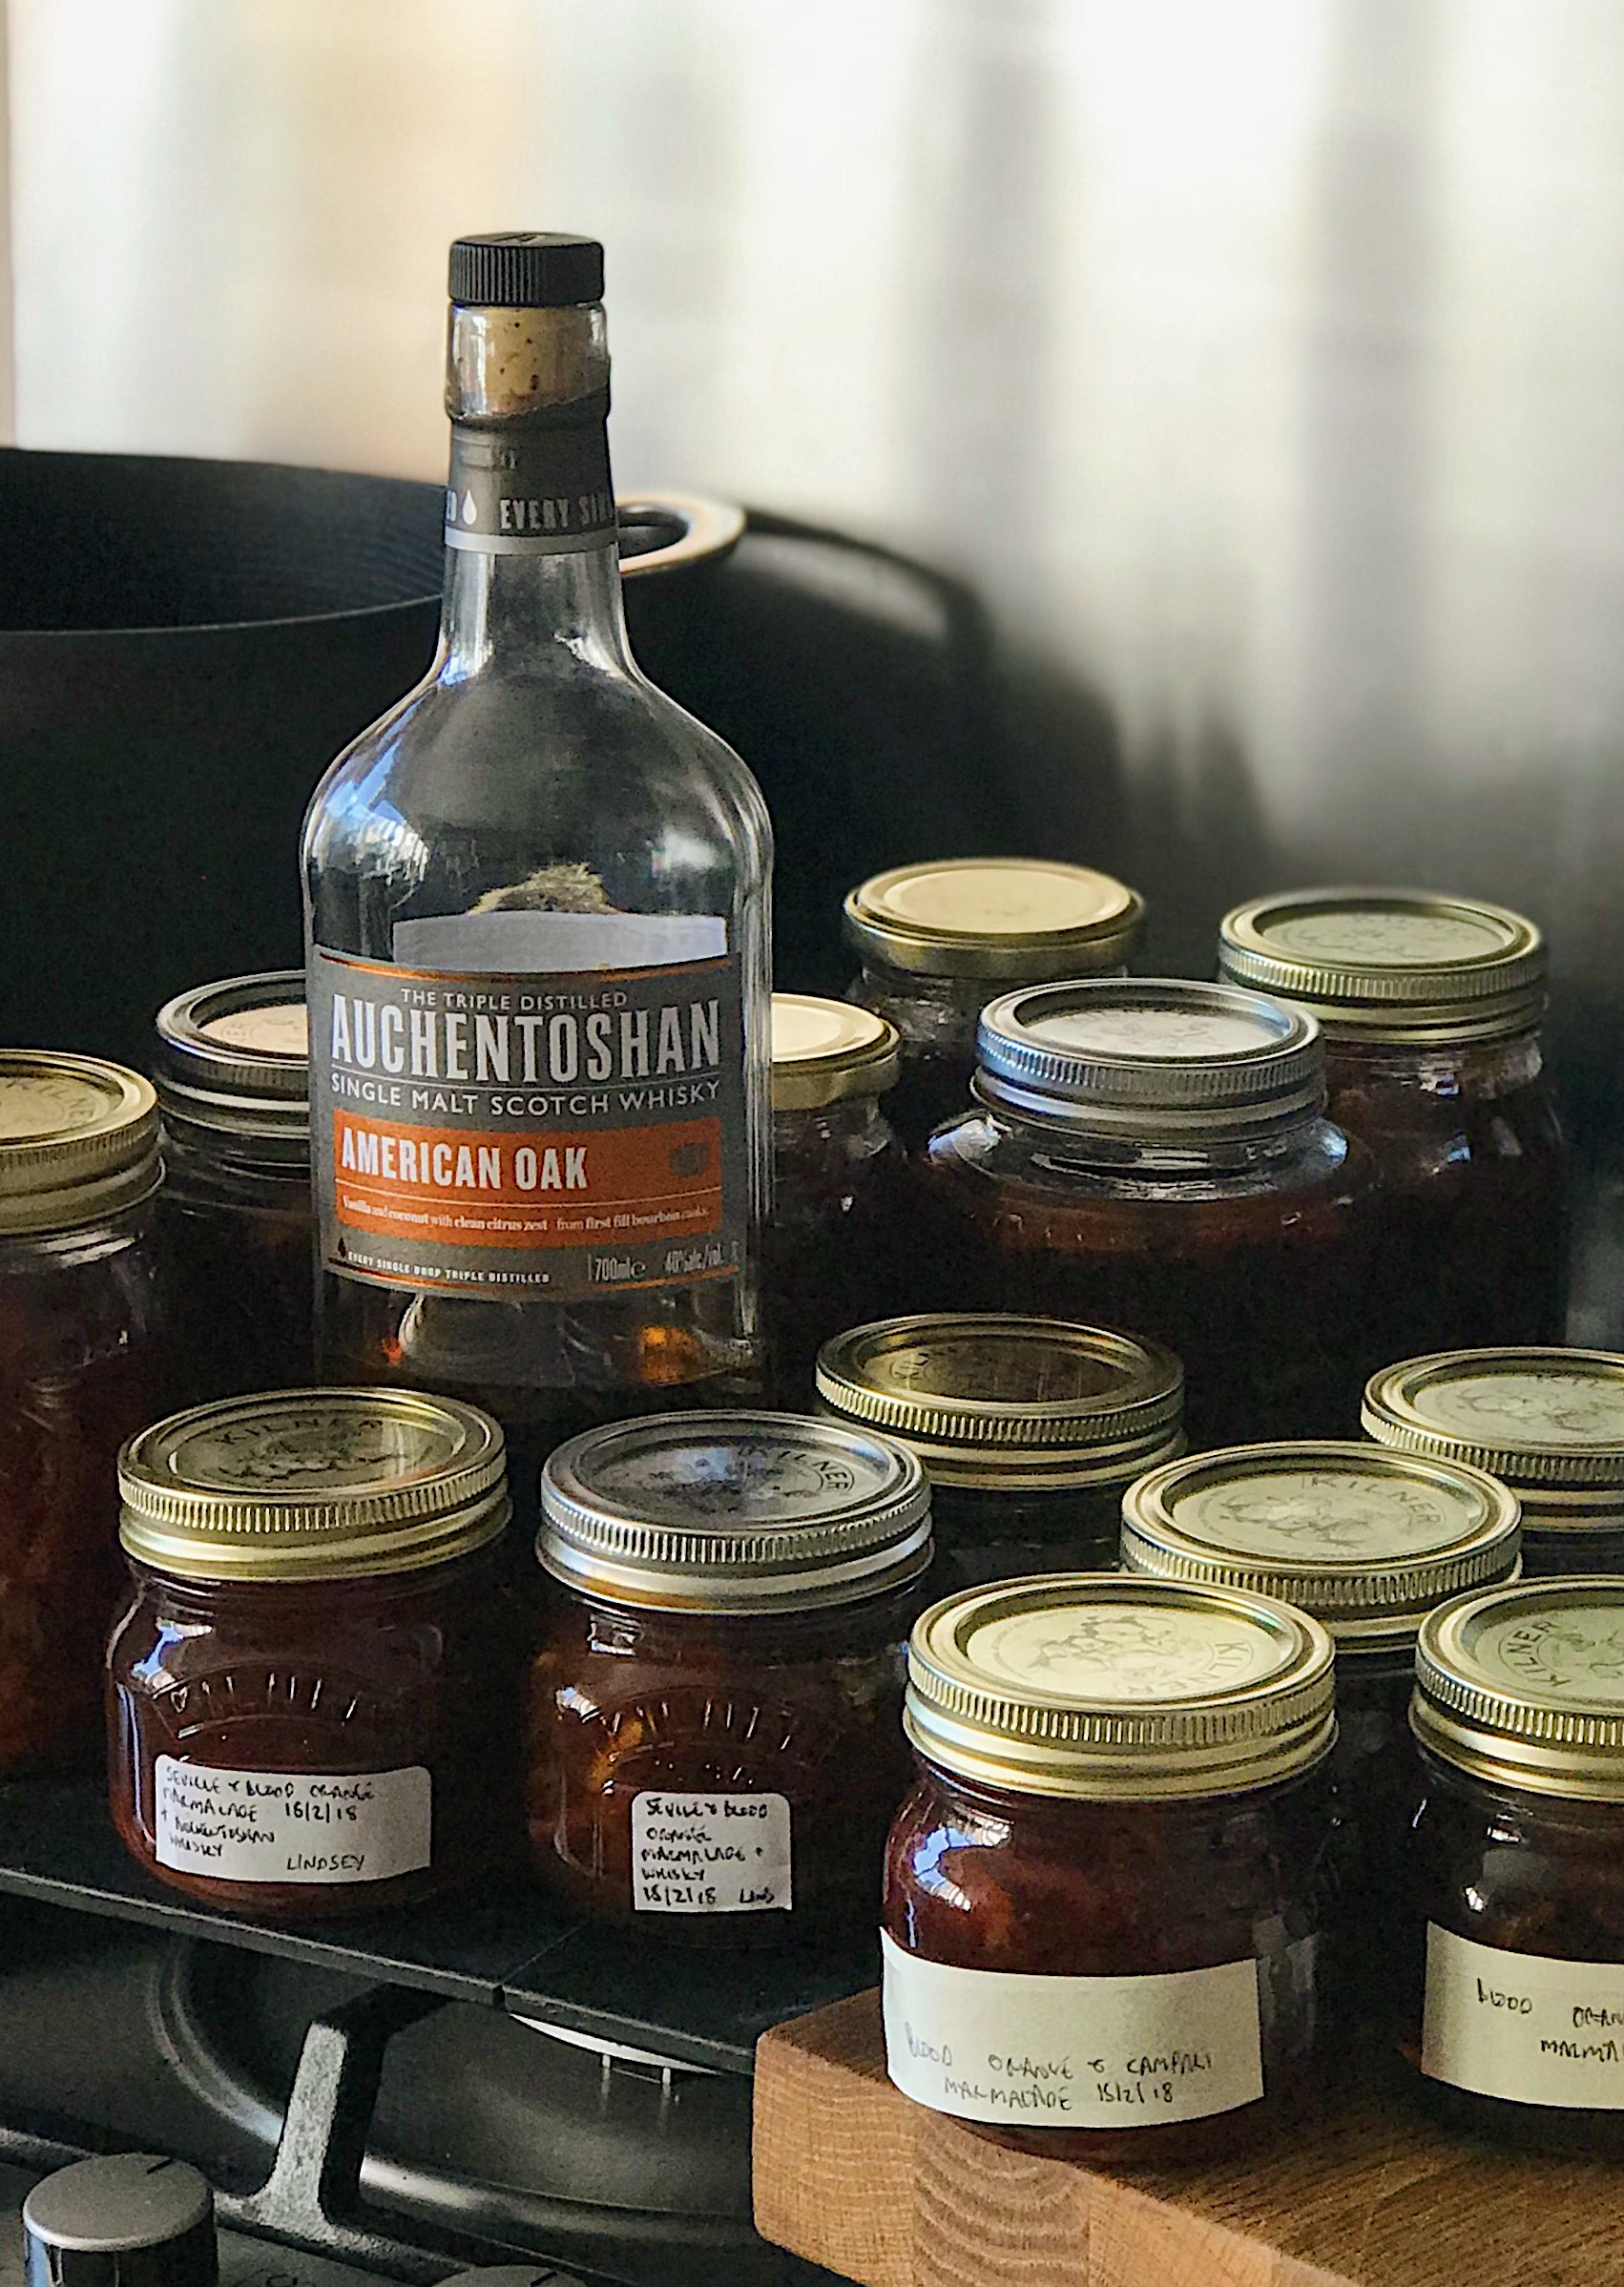
Marmalade with Auchentoshan Whisky aged in American oak bourbon barrels

Now for the best part- the eating! Orange marmalade made easy… enjoy 🍊🍊🍊


comments 7

Sea Bream Acqua Pazza – or Dorade in Crazy Water?

This week has been marked by crazy weather here on the Eastern Seaboard of the USA. It started with an epic snowstorm in the early hours of Sunday morning, however, by Wednesday, we found ourselves basking in positively Mediterranean, or perhaps, Caribbean climes, when the Sun came out and the mercury rose to over 26c / 80f on my deck

The crazy temperature change inspired me to cook a classic Italian dish that I usually save for a Summer’s evening on vacation (hopefully in Italy) but which works just as well year round. A delicious easy to make poached white fish, using those classic Italian ingredients: basil, tomatoes olive oil and garlic

There are many different versions of Acqua Pazza – literally ‘Crazy Water’ (named after the bubbling and spitting combination of olive oil and water in which the fish is cooked). However, the recipe I use and share on the blog today is, I think, one of the easiest to make for even the novice cook and it will always impress with it’s delicious sweet sauce imbuing the fish with that magic of the Italian rustic cuisine

Just 8 Ingredients

Just 8 ingredients!

Ingredients (for 2 – 4)

  • 12 x tbsp of extra virgin olive oil
  • 2 x Whole Sea Bream / known as Dorade in the USA (Tip 1: clean and scale leaving the head and tail and fins on for flavor. Tip 2: you can also use Sea Bass, or another meaty white fish)
  • 4 x garlic cloves, chop roughly
  • 20 x cherry tomatoes (I used around 25 grape tomatoes per fish as they were very small)
  • A generous handful of basil leaves, tear them roughly
  • A couple of decent pinches of sea salt
  • 1 x small red chili (seeds removed), finely diced
  • 400 ml / 13.5 fl oz water
  • A fresh hunk of ciabatta to serve
Sauce Ingredients on the Chopping Board

Sauce ingredients all diced and chopped…

Method

  • Heat the olive oil in a large heavy base skillet / frying pan until hot, then add the whole fish one side down quickly followed by the garlic, tomatoes, chili, basil and salt
  • Then add the water, turning down the heat slightly to a energetic simmer once the sauce mixture is hot. The sauce should partially cover the fish
  • Cook the fish for 7 minutes per side until the eyes whiten, which indicates the fish is cooked through.
  • Then, remove the fish and place on a warm serving dish
  • Turn up the heat of the pan and cook the remaining tomato based sauce for a further 30 seconds to 1 minute, then immediately pour over each fish
  • Serve straight away with a hunk of the ciabatta bread to mop up the delicious tomato basil garlic sauce

Buon Appetito!

Ready to Eat

Ready to Eat – washed down with a glass of Pinot Grigio

By the way, back to the usual winter weather as I write cold and miserable…..roll on Summer!

comments 9

Chocolate Marble Drizzle Cake for Birthdays, Valentine’s Day & More

Whether you celebrate or not, it is difficult to ignore all the flowers, chocolates, and gift displays in many shops in the build up to Valentine’s Day, this Wednesday.  I have been wanting to make a Bundt cake for ages, having borrowed a  cake tin from my Mum’s vintage collection.

Flat Brew Espresso Coffee spread

I discovered a new product, Flat Brew Espresso coffee spread (@flat_brew) and also wanted to experiment with it in a recipe. By random chance, perhaps fate,  I call it cake karma I bumped into the founder who was running a sampling stand in Fortnum & Mason, the famous food emporium in Piccadilly, London just before Christmas. After a chat he suggested the coffee spread would be better in a cake frosting rather than baked into a cake. I am also in family birthday season- three which fall within the next month, including yours truly. So whether it be for a birthday, Valentine’s, Galentine’s or just because you like cake here’s my version of John Whaite’s Chocolate Marble drizzle cake  with a few taste2taste twists. John is a Great British Bake Off Winner, cookery book writer & cookery school founder (@johnwhaiteskitchen) & his Instagram photo looked delish! Cake karma it is so I combined all of the above. The coffee spread is optional, you could use espresso powder, very strong coffee or leave out if not a fan.  However I  like the mocha ( chocolate/ coffee) intense  flavour combo.  If you want to make it easier use a smooth ring or loaf tin to avoid the stress over whether the cake will release from the Bundt tin.  I however was up for the challenge!

Ingredients

Ingredients- Marble Cake:

250g/ 8.8 oz very soft unsalted butter plus extra 20g/0.7 oz for greasing if using Bundt tin

275g/9.7 oz caster ( superfine or baking) sugar

6 large eggs at room temperature, broken into a jug & lightly mixed using a fork

250ml/ 8.4 fl oz buttermilk ( I used Court Lodge organic natural yoghurt)

350g/ 12.3 oz  plain ( all purpose) flour, sieved

1/2 teasp. bicarbonate of Soda, sieved into flour

1 teasp. vanilla bean paste

2 tbsp. cocoa powder

3 tbsp. hot water

2.5 litre/ 10 cup Bundt tin, ring or loaf tin

Ingredients- chocolate/ mocha drizzle:

75g/ 2.6 oz dark chocolate ( 70% cocoa solids)

50g/1.8 oz  milk chocolate ( 55% cocoa solids)

50g/1.8oz   white chocolate

190ml/ 6.5 fl oz double cream  ( heavy cream)

1 dessertspoon Flat Brew Espresso Coffee Spread ( or use  strong espresso powder)

Method:

Preheat fan oven to 160C/ 320F/ gas mark 4

Bundt tin Preparation:

John’s advice – double coating of melted butter

I followed John’s foolproof method for preparing the Bundt tin. Melt 20g/ 0.7 oz butter and brush a thin layer on the inside of the Bundt tin getting in every nook & cranny using a pastry brush. If you have room put in the freezer for a few minutes, I used the fridge to set.

Bundt tin buttered & floured

Repeat with another layer of melted butter then dust all over with a handful of flour again ensuring the whole tin is well coated. Shake the pan to get an even layer then tap out the excess flour over the sink. If using a ring cake or loaf tin just grease with a little soft butter as you won’t need to coat using this method. The cake should release easily after cooling.

Cake:

To ensure  the butter is very soft,  put 250g/ 8.8 oz into a mixer with a paddle/ k blade attachment & beat on high for a few minutes. Use a spatula to scrape down the bowl. Add the caster/ superfine sugar and mix on high speed for about 5 minutes  until pale & fluffy. Scrape down the bowl.

Cake batter – split after 6 eggs ( don’t panic!)

Add the egg mixture a little at a time ( 5 or 6 additions) beating on slow for 30 seconds then on high for 90 seconds. Scrape down the bowl in between egg additions. John’s recipe says the mixture could split. Traditionally I would add a tablespoon of flour to bring back, but the recipe says keep going – so I did! Add the buttermilk or natural yoghurt in 4 additions, mixing on slow for a few seconds then on high for 60 seconds between each addition to combine. Again the cake mixture could split ( it looks slightly lumpy) but again ignore. Add the vanilla paste and mix on high for 30 seconds. Make sure the mixer is on its slowest setting and add the flour in 3 additions mixing for 20 seconds then stopping to scrape down the bowl in between.

Vanilla cake batter

The batter should now be smooth and pale yellow, stop the mixer as soon as combined so as not to overmix which can make the finished cake texture slightly dense. Put half the cake batter into another large mixing bowl.  In a small jug add the cocoa powder,  hot water & mix well until combined. Add to one half of the cake mixture and stir gently with a spatula until an even chocolatey colour. Blob alternatively vanilla and chocolate batters into the tin using 2 spoons. Once full use a spatula or knive to swirl the  batters to form the marbling ( see photo)

Marble cake ready to bake

Bake the cake on the middle shelf  of a fan oven for 50-60 minutes, each oven is different & mine took 50.

In the oven – almost baked

Remove the cake and insert a skewer which will come out ‘clean’, no cake sticking to it which means it is baked. My cake had a few cracks on the surface which is fine as this is the base & won’t show. Leave to cool for 20 minutes in the tin. Give the tin a good shake and invert onto a cooling rack. I used the skewer round the edge of the tin before turning out to help release it cleanly. Allow the cake to cool completely before decorating.

1st Bundt cake out of the tin – phew!

Drizzle:

Break the chocolate into small pieces into 3 bowls – one for each chocolate type. If using the coffee spread/ espresso coffee powder  add 1 dessertspoon to the milk chocolate bowl.  Heat the cream in a small saucepan on medium heat for a few minutes until boiling point and add a third to each bowl to melt the chocolate. Leave for 30 seconds then mix well with a fork ( one for each bowl) until a glossy drizzle mixture is formed. If too thick add a little more hot cream. With the cake on the cooling rack drizzle each chocolate randomly over the cake. I used newspaper on the counter for less mess! The aim is to look abstract so have fun! Leave for at least 1 hour to ensure it is fully set before moving onto a serving plate/ stand.

Chocolate Mocha Drizzle with Flat Brew

I actually left mine overnight. I also used a little dab of melted chocolate on the serving plate to hold the cake as I had to transport it to the other side of London to deliver for the family birthday. This cake keeps well for a few days in an airtight container although it won’t last long, if your family are anything like mine!

Cake for two!

Chocolate ( mocha) marble drizzle cake for Birthdays, Valentine’s Day or for any reason to eat home made cake!